How to Set Up a Grow Tent for Beginners?
To set up a grow tent for beginners, you need to understand the basic components and how they fit together. The easiest way is to follow a step-by-step guide that prioritizes proper ventilation, lighting, and environmental control from the start. You’ll soon see how simple it is!
You’re not alone if you feel a little overwhelmed by all the choices out there for grow tent kits. Many people wonder about the best way to get started. We found that getting your setup right initially saves a lot of headaches later. It’s all about creating the right environment for your plants to thrive inside your home.
- Pick the right tent size for your space.
- Install your lights and ventilation first.
- Manage temperature and humidity with fans.
- Keep it clean to prevent pests.
Let’s walk through exactly how to set up a grow tent, making sure you have all the information you need to succeed.
Setting Up Your Grow Tent: A Beginner’s Guide
Ready to make your home grow dreams a reality? Setting up your first grow tent is an exciting step. We’ll walk you through each part of the process. You’ll create a perfect growing environment for your plants. It’s simpler than you might think!
Step 1: Planning for Success
Before you even unbox your tent, some key decisions will save you time and hassle. Think of it as your project blueprint. A little planning goes a long way.
Choosing the Right Location
Where will your grow tent live? Location matters a lot for your plants’ health. You need a spot that suits your lifestyle too.
- Temperature Stability: Look for a room with stable temperatures. Avoid drafty areas or places with big temperature swings. Your plants like consistency.
- Electrical Access: You’ll need power for lights, fans, and pumps. Make sure outlets are available and can handle the load. Extension cords are okay in a pinch, but a dedicated outlet is best.
- Discretion and Noise: Grow tents can be a bit noisy with fans running. Think about where this sound might be an issue. If you live with others, finding a quiet spot is a good idea.
- Water Source: Watering your plants will be a regular task. Having a water source nearby makes your life much easier. Carrying buckets across the house gets old fast!
Selecting Your Tent Size and Type
Grow tents come in many sizes. The best size depends on your space and how many plants you want to grow. Don’t go too big too fast.
- Think About Your Space: Measure the area where you want to put the tent. Remember to leave some room around the tent for easy access and airflow.
- Consider Your Needs: Are you growing one plant or several? A standard 2×4 foot tent often works well for beginners. It’s manageable but still offers good capacity.
- Tent Material: Look for tents with thick Mylar lining. This reflective material helps maximize your light’s efficiency. Good zippers and strong poles are also key for durability.
Step 2: Assembling Your Grow Tent Structure
Now for the fun part: putting it all together! Most grow tents are designed for easy assembly. It’s like building an adult-sized Lego set.
Unboxing and Preparing the Area
Clear the space where you plan to set up your tent. Take everything out of the box and check the parts list. Make sure you have all the pieces before you start. It saves frustration later.
Frame Assembly
Start with the tent poles and connectors. Follow the instructions that came with your tent. Most frames use a simple push-button or snap-fit system. It’s about building a sturdy skeleton for your tent fabric. Many growers find it helpful to have a second person for this step, especially with larger tents.
Draping the Tent Fabric
Once the frame is up, carefully drape the tent fabric over it. Zippers should be lined up with the frame openings. Often, the fabric will be a tight fit. Gently work it down over the frame, making sure not to tear anything. Zip it up once it’s in place.
Step 3: Setting Up Your Grow Tent Equipment
This is where your grow tent comes to life. Proper setup of equipment ensures your plants get everything they need. The right tools make all the difference.
Lighting System Installation
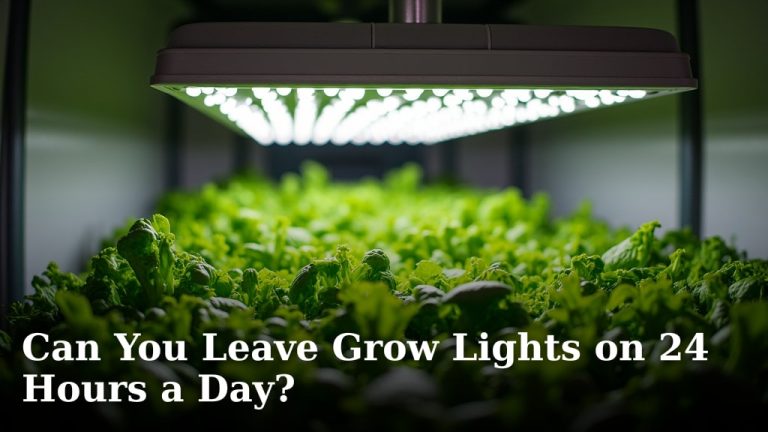
Your lights are the sun for your indoor plants. Installing them correctly is super important. We found that getting your light height right from day one makes a huge difference to seedling success.
- Hang Lights First: Use the hanger bars inside the tent to suspend your grow lights. Secure them with rope ratchets or adjustable hangers. This lets you move them up and down easily.
- Driver Placement: If your light has an external driver (a power box), try to mount it outside the tent or in a spot where it won’t add too much heat inside.
- Test Everything: Plug in your light and make sure it works. Check the timer too. Set it for the correct light/dark cycle your plants need (e.g., 18 hours light, 6 hours dark for vegetative growth).
Ventilation and Air Circulation
Good airflow prevents stuffy air and makes sure your plants breathe easily. Think of it like giving your plants fresh outdoor air, but indoors. Many experts say that proper ventilation is as crucial as lighting for a healthy grow (Environmental Science & Technology).
Here’s a simple checklist:
- Install your exhaust fan at the top of the tent.
- Connect ducting from the fan to an exhaust port.
- Set up an intake fan near the bottom (or just use passive intake).
- Place an oscillating fan inside the tent for air movement.
- Ensure air filters are securely attached if you are using them.
Temperature and Humidity Control
These two factors are key to plant health. You want to aim for a nice, comfortable environment, not too hot, not too cold, not too wet, not too dry. We found that maintaining consistent conditions is a huge win for beginners.
| Sensor Type | What it Measures | Why it’s Important |
|---|---|---|
| Thermo-Hygrometer | Temperature and Humidity | Helps you keep conditions in the sweet spot for plant growth. |
| Minimum/Maximum | Tracks highs and lows | Shows you if conditions are stable or swinging widely. |
| Probe Sensor | Remote Readings | Allows you to measure conditions at plant level. |
Place your thermo-hygrometer at plant canopy height. This gives you an accurate reading of what your plants are experiencing. Many growers suggest keeping a log of readings to spot trends early.
Step 4: Essential Finishing Touches
You’re almost there! These last steps ensure everything is tidy and ready for your plants. It’s about creating a safe and efficient grow space.
Organizing Cables and Wires
Tangled wires are a tripping hazard and can look messy. Use zip ties or cable management wraps to keep everything neat. Make sure wires aren’t dangling into areas where they could get wet. Safety first!
Leak and Light Proofing Your Tent
Check for any light leaks around zippers or seams. A little bit of duct tape can fix small gaps. Also, make sure your exhaust ducting is sealed tightly. You don’t want light getting in or air leaking out where it shouldn’t.
Pre-Plant Check and Cleaning
Before introducing plants, do a final cleaning. Wipe down the Mylar interior. Make sure there’s no dust or debris. This helps prevent pests and diseases from getting a head start. Think of it as preparing a fresh, clean nursery.
Your grow tent is now ready for action! You’ve built a controlled environment for your plants. Remember, consistent monitoring of temperature, humidity, and light cycles will lead to happy, healthy plants. You’ve got this!
Conclusion
You’ve now laid the foundation for a successful indoor garden. Setting up your grow tent correctly from the start prevents many common growing issues. By focusing on proper lighting, ventilation, and environmental control, you create an ideal home for your plants. We found that attention to these details truly helps beginners thrive. Now, you’re ready to introduce your plants and watch them flourish in their new, perfectly controlled home!
Frequently Asked Questions
What is the ideal temperature and humidity range inside a grow tent?
For most plants, aim for temperatures between 70-85°F (21-29°C) during the day and slightly cooler at night. Humidity needs vary by growth stage, but a good starting point is 50-70% for vegging plants and 40-50% during flowering. Always research your specific plant’s needs.
How do I prevent my grow tent from smelling up my home?
A carbon filter is your best friend here. Install it inline with your exhaust fan right inside the tent. As air is pulled through the filter and out of the tent, odors are neutralized. Ensure your tent remains sealed and zipped up.
Can I use regular household fans for air circulation in my grow tent?
While a small oscillating fan can help with air movement inside the tent, you still need an actual exhaust fan and carbon filter system. Standard household fans usually aren’t powerful enough to create the required negative pressure or scrub odors effectively. They’re good for supplemental airflow.
How often should I clean my grow tent?
It’s a good practice to wipe down the interior walls and floor of your tent between each grow cycle or at least every few months. Use a mild disinfectant or simple soap and water. This prevents the buildup of dust, mold, and potential pest issues, keeping your environment sterile.
Is it better to have an active intake fan or passive intake for a beginner?
For beginners, passive intake is often simpler and works well for many setups. This just means leaving a lower vent open for air to be pulled in naturally by the exhaust fan. If you experience issues with maintaining temperature or humidity, or are growing in a larger tent, you might then consider adding an active intake fan.