How to Grow Zz Plants in Low Light?
On this page (3 sections)
Yes, you can absolutely grow ZZ plants in low light conditions! These tough guys are famous for their impressive tolerance to dim spaces. You don’t need bright sunbeams for a happy ZZ plant to thrive.
This plant is a fantastic choice for beginners. It’s also perfect for adding some green to darker corners of your home. Many people find ZZ plants to be remarkably forgiving. You can often forget to water them, and they’ll still look great.
- ZZ plants love low light.
- They need very little water.
- Drainage is key for their roots.
- Avoid direct sunlight to prevent scorching.
Let’s walk through exactly how to give your ZZ plant the best life, even without much natural light.
Caring for Your ZZ Plant in Low-Light Conditions
You might be wondering if your ZZ plant can really survive in a dim corner. The good news is, yes, they are built for it! They are incredibly tough plants. Many people think of them as almost indestructible. This makes them a perfect choice for beginners or those who don’t have a lot of natural light in their homes.
ZZ plants (Zamioculcas zamiifolia) are native to dry, grassy areas of eastern Africa. This means they’ve adapted to handle periods of drought and low light. Their glossy, dark green leaves can even add a touch of elegance to a space that might otherwise feel a bit bleak.
Understanding ZZ Plant Light Needs
So, what does “low light” really mean for your ZZ plant? Snake plants can also suit dimmer rooms; see our guide to snake plants in low light. It’s not about living in complete darkness, but rather environments with minimal natural light. Think of areas further away from windows, or rooms that only get a few hours of indirect sun. Your ZZ plant will be perfectly content here.
They can tolerate very dim conditions, but that doesn’t mean they prefer it. If you notice your plant becoming leggy, meaning the stems are stretching out with sparse leaves, it might be asking for a little more light. However, this is rare.
What About Direct Sunlight?
This is a big one for ZZ plants. They absolutely hate direct sunlight. If a bright sunbeam hits those beautiful leaves, it will likely scorch them. You’ll see yellow or brown spots appear on the foliage. So, if you have a sunny window, keep your ZZ plant a good distance away from it.
Indirect light is your ZZ plant’s best friend. If you have a window that gets bright light but no direct sun, that’s an ideal spot. Or, place it in a room where light filters through sheer curtains. They are remarkably adaptable to various light levels, but direct sun is their one true enemy.
Choosing the Right Pot and Soil
The pot and soil you choose play a vital role, especially when you’re growing a plant that doesn’t need much water. Drainage is absolutely key for ZZ plants. They have thick, fleshy rhizomes (underground stems) that store water. If these sit in soggy soil, they can rot.
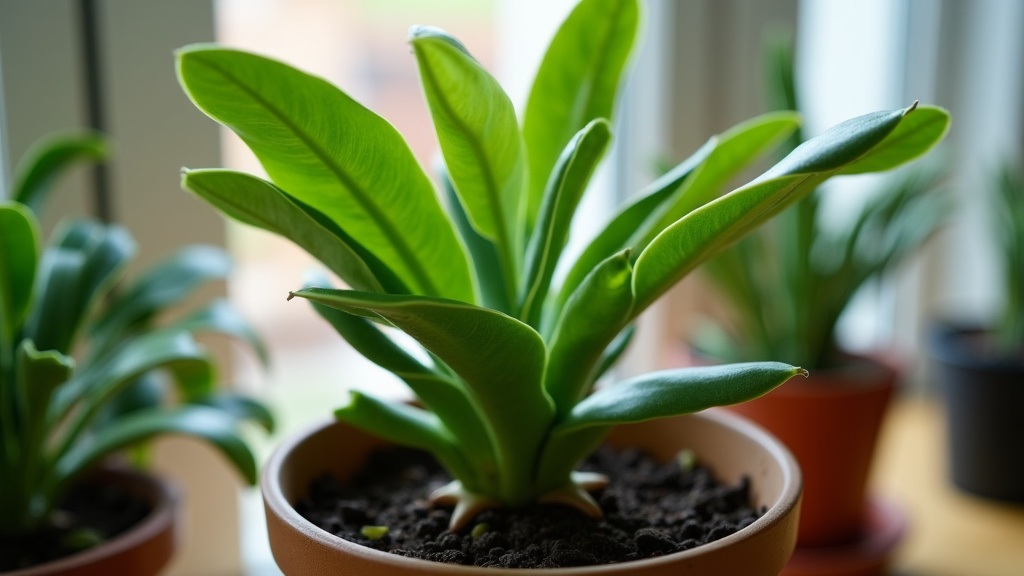
We found that using a pot with drainage holes is non-negotiable. No exceptions! This allows excess water to escape, preventing root rot. Terra cotta pots are a great choice because they are porous and help the soil dry out faster. However, any pot with proper drainage will work.
The Importance of Well-Draining Soil
For soil, you want something that allows water to flow through quickly. A standard potting mix can work, but it often holds too much moisture for ZZ plants. We recommend amending your potting mix with perlite or coarse sand. This will improve aeration and drainage.
Many experts suggest using a cactus or succulent mix. These are specifically formulated to be well-draining. You can also create your own blend. A good ratio is two parts potting soil, one part perlite, and one part coarse sand. This mix mimics the arid conditions your ZZ plant naturally thrives in.
Watering Your Low-Light ZZ Plant: Less is More
This is where many plant parents get it wrong. ZZ plants are drought-tolerant. They actually prefer to dry out between waterings. Overwatering is the most common way to kill this plant. In low-light conditions, they use even less water because photosynthesis is slower.
How often should you water? There’s no set schedule. You need to check the soil moisture. Stick your finger about two inches into the soil. If it feels dry, it’s time to water. If it feels moist, wait longer.
Signs You’re Watering Too Much (or Too Little)
Yellowing leaves are often a sign of overwatering. The leaves might droop a bit, and the soil will feel constantly damp. If you see this, stop watering and let the soil dry out completely. You may need to repot into fresh, dry soil if the rhizomes show signs of rot (mushy and dark).
Underwatering is less common, but it can happen. If your plant isn’t getting any water for a very long time, you might see the leaves start to wrinkle or look dull. They might also lose their plumpness. But remember, they can go weeks without water, so don’t panic too quickly.
| Frequency | Soil Moisture Check | Signs of Trouble |
|---|---|---|
| Rarely (e.g., once a month or less) | Soil is completely dry 2 inches down. | Yellowing leaves, wilting (overwatering). |
| Very Infrequently | Soil is dry 2 inches down. | Wrinkled or dull leaves (underwatering). |
Temperature and Humidity Requirements
ZZ plants are pretty chill when it comes to temperature. They thrive in normal household temperatures. Aim for a range between 65°F and 75°F (18°C to 24°C). They can tolerate slightly cooler or warmer temperatures for short periods.
What about humidity? Unlike many tropical houseplants, ZZ plants don’t need high humidity. They are adapted to drier conditions. So, you don’t need to mist them or place them near a humidifier. They are happy in the average humidity levels found in most homes.
Avoiding Drafts and Temperature Fluctuations
While they are tough, extreme temperature fluctuations can stress your ZZ plant. Keep them away from cold drafts from leaky windows or doors, especially in winter. Also, avoid placing them too close to heating vents or air conditioners, which can dry them out too quickly or cause drastic temperature changes.
Consistent, moderate temperatures are ideal. If you’re comfortable in your home, your ZZ plant likely is too. They are truly one of the most low-maintenance plants available. Their ability to tolerate a range of conditions makes them a popular choice.
Fertilizing Your ZZ Plant: A Little Goes a Long Way
ZZ plants are not heavy feeders. In fact, many people never fertilize their ZZ plants, and they do just fine. If you choose to fertilize, do so sparingly. Over-fertilizing can actually harm the plant.
We found that a balanced liquid houseplant fertilizer, diluted to half strength, is best. Feed your plant only during the growing season, which is typically spring and summer. Once or twice during this period is plenty. Never fertilize in fall or winter when the plant is dormant.
When and How to Fertilize
The best time to fertilize is after you’ve watered the plant. Applying fertilizer to dry soil can burn the roots. So, water your ZZ plant thoroughly, let it drain, and then apply the diluted fertilizer. This ensures the nutrients can be absorbed without causing damage.
Remember, if your ZZ plant is in very low light, it will grow even slower. This means it will need even less fertilizer. It’s always better to err on the side of caution with fertilizing. Your plant will thank you for not overdoing it.
Common Pests and Problems to Watch For
ZZ plants are generally quite resistant to pests and diseases. Their thick leaves and rhizomes make them a tough target. However, no plant is entirely immune. The most common issue you might encounter is related to watering.
As we’ve discussed, root rot from overwatering is the biggest threat. Other potential pests are rare but can include spider mites, mealybugs, or scale. These usually appear if the plant is already stressed or if it’s been introduced from another infested plant.
Dealing with Pests and Diseases
If you spot any pests, the first step is to isolate the plant. This prevents the pests from spreading to your other houseplants. You can often wipe away small infestations with a damp cloth or a cotton swab dipped in rubbing alcohol. For more stubborn infestations, an insecticidal soap can be effective.
If root rot is suspected, you’ll need to act quickly. Gently remove the plant from its pot. Trim away any mushy, brown, or black rhizomes and roots with a clean knife or scissors. Repot the plant in fresh, dry, well-draining soil and refrain from watering for a couple of weeks. This gives the damaged roots a chance to recover.
Repotting Your ZZ Plant: A Rare Occasion
ZZ plants are slow growers. They actually don’t mind being a little root-bound. You will likely only need to repot your ZZ plant every 2-3 years, or even less often. They often communicate their need for repotting by pushing out of their current pot or showing significantly slowed growth.
When it’s time to repot, choose a pot that is only one size larger than the current one. Again, make sure it has drainage holes. Use the same well-draining soil mix we discussed earlier. Repotting is best done in the spring when the plant is entering its active growing season.
How to Repot Successfully
Gently remove the plant from its old pot. Inspect the roots and rhizomes. Trim away any dead or mushy parts. Place a layer of your fresh soil mix in the bottom of the new pot, then position your ZZ plant. Fill in around the sides with more soil, leaving about an inch of space at the top for watering.
After repotting, it’s best to wait about a week before watering. This allows any minor root damage that occurred during repotting to heal. Then, resume your normal watering schedule, always checking the soil moisture first.
A Quick Checklist for Low-Light ZZ Plant Success
- Location, Location, Location: Place in a spot with indirect light, away from direct sun.
- Potting Power: Use a pot with drainage holes.
- Soil Smart: Opt for well-draining soil, like a cactus mix or amended potting soil.
- Water Wisely: Allow soil to dry out completely between waterings.
- Temperature Tidy: Keep in stable household temperatures, avoiding drafts.
- Feed Faintly: Fertilize rarely, if at all, during the growing season.
Conclusion
You now have all the knowledge to successfully grow a ZZ plant, even in dimmer spots. Remember, these plants are famously low-maintenance. Your ZZ plant thrives on neglect more than attention. You’ve learned that proper drainage, infrequent watering, and avoiding direct sun are your main keys to success. By following these simple tips, you’ll enjoy your plant’s glossy foliage for years to come. Go ahead and pick the perfect low-light corner for your new green companion!
Frequently Asked Questions
Will my ZZ plant die if it doesn’t get enough light?
No, your ZZ plant will likely not die from low light. They are specifically adapted to survive in dim conditions. However, very prolonged periods in near-total darkness might cause slow growth or legginess. For dim rooms, see our guide to grow lights for low-light plants. Just ensure it receives some ambient light.
Can I put my ZZ plant right next to a window?
It’s best to avoid placing your ZZ plant directly in a window, especially if it’s a south or west-facing window that gets intense, direct sunlight. This can scorch the leaves. A spot near an east-facing window or several feet away from a brighter window is ideal.
How do I know if I’m overwatering my ZZ plant?
Overwatering is the most common issue. Signs include yellowing leaves, mushy stems at the base, and soil that stays wet for long periods. If you notice these, stop watering immediately and let the soil dry out completely before watering again.
Can I use any old potting soil for my ZZ plant?
While you can use standard potting soil, we recommend amending it for better drainage. ZZ plants are prone to root rot if their roots sit in soggy soil. Mixing in perlite, coarse sand, or using a cactus/succulent mix will significantly improve drainage.
My ZZ plant’s leaves are turning yellow, what should I do?
Yellowing leaves on a ZZ plant are usually a sign of overwatering. First, check the soil moisture. If it’s damp, hold off on watering. Ensure your pot has drainage holes. You may need to let the soil dry out thoroughly or even repot if root rot is suspected.