
How Much Does a Full Indoor Grow Tent Setup Cost?
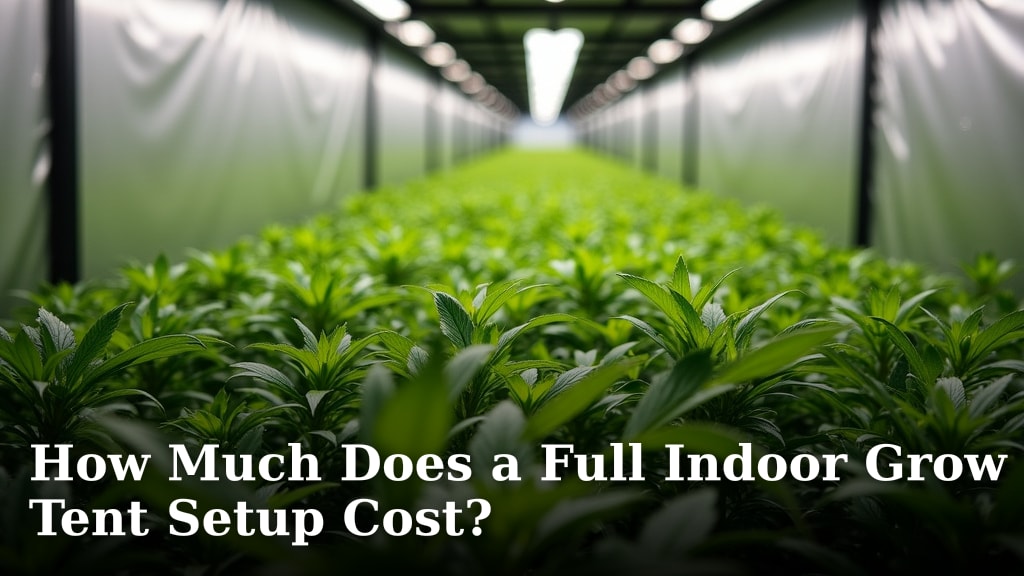
A full indoor grow tent setup can cost anywhere from $300 to over $2,000, depending on the quality and features you choose. We found that most beginner setups land in the $500 to $1,000 range for all necessary components.
This price includes everything from the tent itself to lighting, ventilation, and growing mediums. The final cost really boils down to your specific goals and budget. Are you looking for a simple hobby setup or something more advanced?
- Beginner setups often cost $500-$1,000.
- Advanced setups can exceed $2,000.
- Lighting and ventilation are key cost factors.
- Don’t forget consumables like nutrients.
- Quality components impact long-term success.
Let’s walk through the essential items you’ll need and what you can expect to pay for each. We’ll help you understand where to save and where to splurge for the best results.
Breaking Down the Cost of an Indoor Grow Tent Setup
You’re curious about the cost, and we understand why. A successful indoor garden needs the right tools. Let’s explore what goes into building your ideal grow space, component by component.
The total price tag for your indoor grow tent setup hinges on several factors. These include the size of your tent, the quality of your equipment, and the specific types of plants you plan to grow. Don’t worry, we’ll guide you through each piece.
The Grow Tent: Your Plant’s Home Base
The grow tent itself is the foundation of your indoor garden. Think of it as a mini-greenhouse designed to control your plants’ environment. Prices vary widely based on size and material quality.
For a beginner, a 2×2 or 2×4 foot tent is often a great starting point. These smaller tents are manageable and cost-effective. Larger tents, like 4×4 or 5×5 feet, offer more space but also require more powerful lighting and ventilation.
- Small Tents (2×2, 2×4 ft): Expect to pay $80 – $150. These are perfect for 1-2 plants.
- Medium Tents (3×3, 4×4 ft): These typically range from $150 – $300. Ideal for 3-6 plants.
- Large Tents (5×5 ft and up): These can cost $300 – $600+. Best for serious growers or multiple plants.
Look for tents with durable canvas, strong zippers, and a reflective interior lining. These features help with light efficiency and overall longevity.
Lighting Systems: Bringing the Sunshine Indoors
This is arguably the most critical and often the most expensive component. Your plants need light to thrive, and not just any light. You’ll need specialized grow lights that mimic natural sunlight.
There are a few main types of grow lights, each with its own price point and benefits. The choice you make here will significantly impact your electricity bill and plant growth.
LED Grow Lights: The Modern Choice
LEDs (Light Emitting Diodes) are popular for their energy efficiency and long lifespan. While the upfront cost can be higher, they save you money on electricity and bulb replacements over time. We found they also produce less heat, which is a bonus for temperature control.
- Small LED (100-150W equivalent): $75 – $200. Good for small tents (2×2).
- Medium LED (200-300W equivalent): $200 – $500. Suitable for 2×4 or 3×3 tents.
- Large LED (400W+ equivalent): $500 – $1,000+. For 4×4 tents and larger. For more detailed guidance, explore our article on what size grow light you need for your specific grow tent.
Many growers consider LEDs a worthwhile investment due to their effectiveness and lower operating costs.
HID Grow Lights (MH/HPS): Traditional Powerhouses
HID (High-Intensity Discharge) lights, specifically Metal Halide (MH) for vegetative growth and High-Pressure Sodium (HPS) for flowering, are powerful and effective. They produce more heat than LEDs, so you’ll need better ventilation.
- 250W HID Kit: $100 – $200.
- 400W HID Kit: $150 – $250.
- 600W HID Kit: $200 – $350.
These prices often include a ballast, reflector, and bulb. Remember to factor in replacement bulbs, which are needed more often than with LEDs.
Ventilation and Air Circulation: Keeping Things Fresh
Good air movement is essential for healthy plants and preventing mold. This category includes exhaust fans, carbon filters, and oscillating fans.
Exhaust Fan & Carbon Filter: Odor Control and Air Exchange
An exhaust fan pulls stale, hot air out of your tent, while a carbon filter scrubs the air of any odors. This is a must-have for discreet indoor growing.
- Small Kits (4-inch fan/filter): $100 – $200.
- Medium Kits (6-inch fan/filter): $150 – $300.
- Large Kits (8-inch fan/filter): $250 – $400+.
The size of your fan and filter should match the cubic feet per minute (CFM) rating needed for your tent. A general rule is to exchange the air in your tent every 1-3 minutes.
Oscillating Fan: Gentle Breeze for Strong Stems
An oscillating fan inside the tent helps circulate air around your plants. This prevents hot spots and strengthens stems, mimicking natural outdoor conditions.
- Small Clip-on Fan: $20 – $40.
- Medium Floor/Pedestal Fan: $30 – $60.
Don’t skip this small but mighty component. It makes a big difference to plant health.
Growing Medium and Containers: Where Your Roots Will Live
Your plants need something to grow in. Common choices include soil, coco coir, or hydroponic systems. The containers are also a key part of this cost.
- Pots (Fabric or Plastic): A set of 5-gallon fabric pots might cost $20 – $40 for a pack of 5. Plastic pots are usually a bit cheaper.
- Soil/Coco Coir: A large bag (1.5-2 cubic feet) can run $25 – $50. This is usually enough for several plant cycles.
- Hydroponic Systems: These vary wildly, from simple deep water culture (DWC) buckets ($50 – $100 per plant) to more complex systems that can cost hundreds.
For beginners, soil or coco coir in fabric pots is often the easiest and most forgiving route.
Nutrients and Supplements: Plant Food for Growth
Just like you need food, your plants need specific nutrients to grow big and strong. A basic nutrient line will include bottles for vegetative growth and flowering.
- Starter Nutrient Kit: $50 – $150. These often contain smaller bottles of base nutrients and some supplements.
- Individual Nutrient Bottles: $20 – $50 each. You might buy these as needed.
Remember, nutrients are a recurring cost. You’ll need to replenish them with each grow cycle. Research suggests that a balanced nutrient regimen is crucial for optimal yield (National Center for Biotechnology Information).
Essential Tools and Accessories: The Little Things That Matter
Don’t forget these smaller items that make your life easier and your grow more successful.
- Thermometer/Hygrometer: $15 – $30. Essential for monitoring temperature and humidity.
- Timers (Digital/Analog): $10 – $25 each. For automating lights and fans.
- pH Meter & Calibration Solution: $20 – $50. Crucial for checking your water and nutrient solution pH.
- Pruning Shears: $10 – $25. For trimming and training your plants.
- Plant Ties/Stakes: $5 – $15. To support your growing plants.
- Grow Glasses: $20 – $40. Protect your eyes from intense grow lights.
These small investments prevent big headaches later. We’ve found that having the right tools makes the growing process much more enjoyable.
Budgeting for Your First Grow Tent Setup: Where to Save and Splurge
Now that we’ve covered the components, how do you put it all together financially? It’s all about balance.
Where You Can Save Money
You don’t need the absolute best of everything right away. Consider these areas for initial savings:
- Tent Size: Start with a smaller tent. It’s cheaper to light and ventilate.
- Lighting: A quality entry-level LED or even a basic HID kit can produce great results for a first grow.
- Pots: Basic plastic pots work fine; you can upgrade to fabric later.
- Nutrients: A simple 2- or 3-part nutrient line is often sufficient; avoid excessive supplements initially.
Remember, your first grow is a learning experience. You can always upgrade components later as you gain more experience and refine your goals.
Where It’s Worth Splurging (A Little)
Some items are worth the extra investment upfront for performance and reliability:
- Quality Grow Light: A good light is the heart of your system. Better lights often mean better yields and plant health.
- Reliable Exhaust Fan: A quiet and efficient exhaust fan makes a huge difference in managing your environment and noise levels.
- pH Meter: A cheap pH meter can give inaccurate readings, leading to nutrient deficiencies. Invest in a decent one.
- Carbon Filter: Don’t skimp if odor control is important to you. A good filter lasts longer and works better.
Think of it like buying tools for a new hobby. Some basic items are fine, but certain key pieces make the whole experience smoother and more successful.
Putting It All Together: A Sample Cost Breakdown
Let’s look at a typical beginner setup to give you a clearer picture. Prices are estimates and can fluctuate.
| Component | Beginner Budget ($) | Mid-Range Budget ($) |
|---|---|---|
| Grow Tent (2×2 to 2×4 ft) | $80 – $120 | $120 – $180 |
| LED Grow Light (100-150W) | $80 – $150 | $150 – $300 |
| Exhaust Fan & Filter (4-inch) | $100 – $150 | $150 – $250 |
| Small Oscillating Fan | $20 – $30 | $30 – $45 |
| Pots & Growing Medium | $30 – $50 | $50 – $80 |
| Nutrient Starter Kit | $50 – $80 | $80 – $120 |
| Thermometer/Hygrometer | $15 – $25 | $25 – $40 |
| Timers (2) | $20 – $30 | $30 – $40 |
| pH Meter & Solutions | $25 – $40 | $40 – $70 |
| Misc. Tools (shears, ties) | $15 – $25 | $25 – $40 |
| Total Estimated Cost | $435 – $700 | $700 – $1,165 |
As you can see, a solid beginner setup falls comfortably within the $500-$1000 range we mentioned earlier. It’s an investment, but a rewarding one!
Your Grow Tent Setup Checklist
Before you make any purchases, here’s a quick list to review:
- Grow Tent (appropriate size)
- Grow Light (LED or HID)
- Exhaust Fan with Carbon Filter
- Small Oscillating Fan
- Pots and Growing Medium (soil, coco, etc.)
- Nutrient Line (for your chosen medium)
- Thermometer/Hygrometer
- Light Timer
- pH Meter & Calibration Fluid
- Pruning Shears
Having this checklist handy will ensure you don’t forget any critical pieces for your indoor garden.
Conclusion
Building your first indoor grow tent setup is an exciting journey. While costs can range from a few hundred dollars to over a thousand, you now have a clear understanding of where your money goes. We’ve shown you how to build a functional and affordable setup for around $500-$700. Remember, investing in quality components like your grow light and exhaust fan pays off long-term. Take what you’ve learned here, create a budget that works for you, and get ready to enjoy the rewards of your very own indoor garden!
Frequently Asked Questions
Can I really start an indoor grow for under $500?
Yes, absolutely! As we outlined, a basic beginner setup can definitely fall within a $400-$700 range. You might need to prioritize essentials and look for sales or bundles, but it’s very achievable. Focus on a smaller tent and an efficient LED light.
How much will electricity cost for my grow tent setup?
Electricity costs depend on your light type, fan usage, and local rates. For a 2×2 tent with a 150W LED, expect around $15-$30 per month. Larger setups with more powerful lights and fans will naturally increase this amount, so always factor it in.
Is it cheaper to build my own grow tent setup or buy a kit?
Often, buying individual components allows you to get better quality items for specific needs. Pre-made kits can sometimes include lower-quality parts to keep the price down. Researching each piece helps you choose what’s best for your budget and goals.
What’s the one item I shouldn’t try to save money on?
Your grow light is arguably the most critical component. It directly impacts plant health and yield. Investing in a good quality LED or HID light upfront will lead to better results and fewer issues down the line. It’s truly worth the splurge.
Do I need all those extra accessories like pH meters and pruning shears right away?
While some accessories aren’t strictly essential to get started, a pH meter and a timer are very important for success. Pruning shears can wait a bit, but monitoring temperature, humidity, and pH levels prevents many common plant problems. We recommend getting them soon after your initial setup.
