
How to Grow Tomatoes Hydroponically Indoors from Seed?
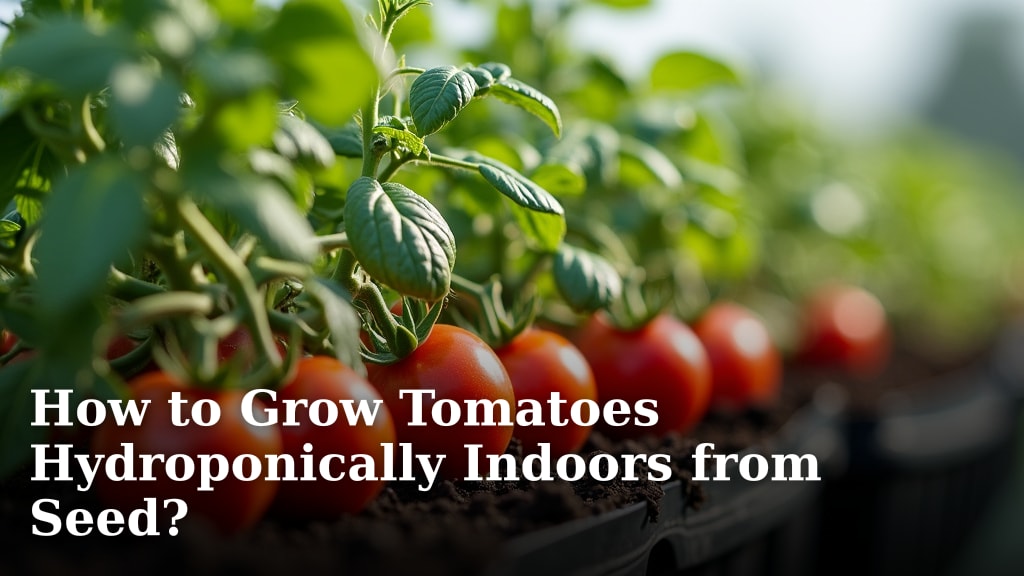
Yes, you can absolutely grow tomatoes hydroponically indoors from seed! It’s a rewarding way to get fresh, homegrown tomatoes year-round, even without a garden. You just need the right setup and a little patience.
Growing tomatoes hydroponically indoors means you control all the plant’s needs: water, nutrients, and light. This method often leads to faster growth and higher yields than traditional soil gardening. It’s a great option for apartment dwellers and those with limited outdoor space.
- Start with quality seeds.
- Choose a suitable hydroponic system.
- Provide adequate light and nutrients.
- Monitor pH and EC levels.
- Harvest your delicious indoor tomatoes!
Let’s walk through exactly how to get your tomato seeds started in your indoor hydroponic garden, step by step.
Getting Your Indoor Hydroponic Tomatoes Started From Seed
So, you’re ready to ditch the store-bought tomatoes and grow your own? That’s fantastic! Starting hydroponic tomatoes indoors from seed is totally doable. It might sound a bit technical, but we’ll break it down into simple steps. You’ll be enjoying your own juicy tomatoes before you know it.
Choosing the Right Tomato Seeds for Hydroponics
Not all tomato seeds are created equal, especially for indoor hydroponic growing. You want varieties that are compact and do well in containers. These are often called ‘determinate’ or ‘bush’ varieties. They grow to a certain size, produce their fruit, and then stop. This keeps your plants manageable indoors.
Consider ‘patio’ or ‘dwarf’ varieties. They are bred for smaller spaces. Indeterminate varieties, on the other hand, keep growing and producing all season. They can get quite large and might be too much for a typical indoor setup. Research seed packets for descriptions like ‘ideal for pots’ or ‘compact growth’.
Recommended Tomato Varieties
We found that certain types consistently perform well. ‘Tiny Tim’ is a classic dwarf variety, perfect for beginners. It stays very small and produces lots of cherry tomatoes. ‘Patio Princess’ is another great choice. It’s a determinate plant that doesn’t get too wide. For something a bit different, try ‘Micro Tom’. It’s one of the smallest tomato varieties available, often staying under 12 inches tall.
Understanding Hydroponic Systems for Tomatoes
There are several hydroponic systems you can use. Each has its pros and cons. For tomatoes, you’ll want a system that can support a larger plant and its nutrient needs. We’ve seen great success with Deep Water Culture (DWC) and Nutrient Film Technique (NFT) systems, but Dutch Buckets are also a popular choice for larger plants like tomatoes.
Deep Water Culture (DWC)
In a DWC system, the plant roots hang directly into a nutrient-rich water reservoir. An air pump adds oxygen to the water. This is a relatively simple system to set up. It works well for many plants, including smaller tomato varieties. You’ll need to ensure the reservoir is large enough to support the growing tomato plant. Many guides suggest a minimum of 5 gallons per plant.
Nutrient Film Technique (NFT)
NFT systems use a gentle flow of nutrient solution that runs over the plant roots in a channel. This system is very efficient with water and nutrients. However, it can be more complex to set up and maintain. It’s best suited for smaller, faster-growing plants. For larger, heavier plants like tomatoes, you might need a sturdier version or a different system.
Dutch Buckets (Bato Buckets)
Dutch Buckets are a type of drip system. Each plant is in its own bucket filled with an inert growing medium like perlite or coco coir. Nutrient solution is dripped onto the roots and drains to a collection tank. This system is excellent for larger plants like tomatoes. It provides great support and allows for easy management of nutrients and water for each plant individually. We found this to be a robust choice for serious indoor tomato growers.
Starting Your Tomato Seeds: The Germination Process
Germinating tomato seeds is the first big step. You want to give them the best possible start. This is where many new growers can feel a little anxious. Don’t worry, it’s simpler than it sounds!
Soaking and Pre-sprouting
Before planting, some people like to soak their seeds. A quick soak in plain water for a few hours can help soften the seed coat. This might speed up germination a bit. Then, you can place the seeds between damp paper towels. Put these inside a plastic bag or container. Keep them in a warm spot, around 70-80°F (21-27°C). Check them daily for sprouts.
Using Seedling Plugs or Rockwool Cubes
Instead of paper towels, you can use special seedling plugs or rockwool cubes. These are designed for starting seeds in hydroponic systems. Soak your rockwool cubes thoroughly in pH-adjusted water. Place one or two tomato seeds into the small hole at the top of each cube. You can then place these cubes in a seed tray under a gentle light or on a heat mat.
We found that rockwool cubes are very convenient. They fit perfectly into many hydroponic system net pots later on. Just make sure the cubes stay moist, but not waterlogged. Too much water can drown the seeds before they even sprout. A spray bottle is your friend here!
Providing the Right Environment for Germination
Seeds need warmth and moisture to sprout. A consistent temperature is key. A seedling heat mat can be a game-changer. It provides gentle, steady warmth from below. This helps the seeds wake up and start growing. Keep the humidity high around the seeds. A small plastic dome over your seed tray can help with this. Your goal is to mimic the conditions a seed would experience in warm soil.
Most tomato seeds will germinate within 5-10 days. You’ll see a tiny root emerge first, followed by the seedling. Once you see the sprout, it’s time to move it to its next stage. You don’t want those fragile roots sitting in standing water at this early stage. Many experts suggest waiting until you see the first set of true leaves before moving to a full hydroponic setup.
Setting Up Your Hydroponic System for Seedlings
Once your seeds have sprouted and have a small root showing, it’s time to get them into your main hydroponic system. This is an exciting moment! You’re transitioning them from their cozy starter home to their lifelong nutrient bath.
Choosing Your Growing Medium
If you used rockwool cubes, you can often place them directly into your system’s net pots. Fill the rest of the net pot with an inert growing medium. Options include clay pebbles (hydroton), coco coir, or perlite. These materials provide support for the young plant and help anchor it. They don’t provide nutrients, as your hydroponic solution will do that.
If you started seeds directly in plugs, gently transfer the entire plug into a net pot. Then, fill around it with your chosen medium. The idea is to support the stem and prevent the seedling from toppling over. Make sure the roots can grow freely out of the bottom of the net pot.
Preparing Your Nutrient Solution
Hydroponic systems rely on a carefully balanced nutrient solution. For young seedlings, you need a mild nutrient mix. Too many nutrients can burn their delicate roots. We found that using a nutrient solution specifically formulated for seedlings or early growth is best. Always follow the manufacturer’s instructions for mixing. Too much or too little is a common mistake.
The pH of your nutrient solution is also critical. For tomatoes, the ideal pH range is typically 5.5 to 6.5. This range ensures the plant can absorb all the necessary nutrients. You’ll need a pH meter to test your solution. Keep pH testing kits handy. Adjusting pH is usually done with pH Up or pH Down solutions. Many growers find it easiest to mix their nutrient solution in a separate container first, then adjust pH before filling their main reservoir.
Introducing Seedlings to the System
Carefully place your net pots with seedlings into your hydroponic system. Ensure the bottom of the net pot or the rockwool cube is just touching or very close to the nutrient solution. For some systems like NFT, the solution will need to be flowing to reach the roots. For DWC, the air stone will keep oxygen circulating in the water below. The goal is to provide consistent moisture to the roots without drowning the seedling.
It’s a good idea to start with a lower concentration of nutrients. You can gradually increase it as the plant grows. Watch your seedlings closely for any signs of stress. Yellowing leaves or wilting can indicate an issue with nutrients, pH, or water. Early detection is key to solving problems.
Lighting and Environmental Controls for Indoor Tomatoes
Light is your tomato plant’s food factory. Indoors, you need to provide it yourself. This is where grow lights come in. Tomatoes are heavy feeders, and they need a lot of light to thrive and produce fruit. We’ve seen that the right lighting can make all the difference between a sad, leggy plant and a robust, fruiting one.
Choosing the Right Grow Lights
For tomatoes, you’ll want full-spectrum LED grow lights. These mimic natural sunlight well. They are also energy-efficient and produce less heat than older lighting technologies. Ensure your light is powerful enough for fruiting plants. Look for lights with a good PAR (Photosynthetically Active Radiation) rating. The distance between your lights and the plants is also important. To ensure your plants thrive, learn how to choose the right grow light for your specific needs.
Start with the lights further away and gradually lower them as the plants grow. Too close can cause light burn. Too far, and your plants will stretch trying to reach the light. A general rule of thumb is to keep lights about 12-24 inches above the canopy, adjusting as needed. Your plants will usually tell you if the light is too close by developing bleached or crispy leaves.
Light Cycles and Intensity
Tomatoes need a good amount of light each day. Most experts recommend 14-16 hours of light per day for fruiting plants. You can use a simple timer to automate your lights. Consistency is crucial. Avoid constantly changing the light schedule, as this can stress the plant. We found that a 16-hour on, 8-hour off cycle works wonderfully.
The intensity of the light matters too. As your plants get bigger and start to flower and fruit, they will need more intense light. You might need to upgrade your lighting setup or use multiple lights. Observing your plants is the best way to gauge if they are getting enough light. Healthy green leaves and sturdy stems are good indicators.
Temperature and Airflow Management
Tomatoes prefer warm temperatures. During the day, aim for 70-80°F (21-27°C). At night, a slight drop to 60-70°F (15-21°C) is beneficial for fruit set. Avoid drastic temperature fluctuations. These can shock the plants. Keep a thermometer near your plants to monitor the temperature.
Good airflow is also essential. Stagnant air can lead to fungal diseases and pests. Use a small oscillating fan to gently circulate air around your plants. This helps strengthen their stems and prevents mold. It also helps with pollination when the time comes. Ensure your fan isn’t blowing directly on the plants constantly, just creating gentle movement.
Monitoring and Maintaining Your Hydroponic Tomato Garden
Hydroponics requires a bit more attention than soil gardening. You are the plant’s caretaker for everything! Regularly checking your system and your plants will prevent small issues from becoming big problems. Think of yourself as a detective, always looking for clues.
Nutrient Levels and EC/TDS
Your plants will consume nutrients from the water. This means the concentration of nutrients changes over time. You’ll need to monitor the Electrical Conductivity (EC) or Total Dissolved Solids (TDS) of your solution. This measures the amount of nutrients present. For young tomato plants, aim for an EC of 1.2-2.0 mS/cm. As they grow and fruit, this can increase to 2.0-3.5 mS/cm (Michigan State University Extension).
You’ll need an EC/TDS meter for this. Top up your reservoir with fresh nutrient solution as needed. The water level will drop as plants drink and as water evaporates. Some growers choose to completely change their nutrient solution every 1-2 weeks. This ensures a fresh supply of all necessary elements. Others simply top up, adjusting nutrient strength as they go. We found topping up is easier for smaller systems.
pH Monitoring and Adjustment
As mentioned earlier, pH is critical. Plants can only absorb nutrients within a specific pH range. If your pH is too high or too low, your plants can develop nutrient deficiencies. Even if you have plenty of nutrients in the water. Check your pH daily, especially when you first set up your system. Then, you can often get away with checking every 2-3 days once things are stable.
Remember that your plants, as they grow, can also affect the pH of the solution. Use your pH meter and pH Up/Down solutions to keep it within that 5.5-6.5 sweet spot for tomatoes. It sounds like a lot, but it becomes routine quickly. It’s a bit like brushing your teeth – you just do it!
Water Quality Matters
The quality of the water you use for your nutrient solution is important. Tap water can contain chlorine or high levels of minerals that can interfere with your nutrient balance. Many growers prefer to use filtered water, like reverse osmosis (RO) water. If you use tap water, letting it sit out for 24 hours can help dissipate chlorine.
Conclusion
You’ve learned how to take tomato seeds from sprout to harvest right in your home! From selecting the right compact varieties and understanding hydroponic systems like DWC or Dutch Buckets, to carefully germinating seeds and providing the perfect light and nutrient balance, you’re well on your way. Remember that consistent monitoring of pH and nutrient levels is your key to success. So, get your supplies ready, pick out your favorite dwarf tomato variety, and get planting. Your first hydroponic tomato harvest is closer than you think!
Frequently Asked Questions
How long does it take for hydroponic tomato seeds to sprout?
Typically, tomato seeds will sprout and show roots within 5 to 10 days. This timeline can vary slightly depending on the seed variety and the warmth of your germination environment. A consistent temperature between 70-80°F (21-27°C) will give you the best results.
What is the best hydroponic system for beginners growing tomatoes?
For beginners, a Deep Water Culture (DWC) system is often recommended for its simplicity. It requires fewer moving parts and is easier to understand. As your tomatoes grow larger, a Dutch Bucket system becomes a great option due to its support for bigger plants.
How often do I need to change the nutrient solution?
It’s a good practice to completely change your nutrient solution every 1 to 2 weeks. This ensures your plants always have access to a full spectrum of fresh nutrients. You will also need to top it up with water or a diluted nutrient solution between changes as the water level drops.
Can I use regular potting soil in my hydroponic system?
No, you should not use regular potting soil. Hydroponic systems use inert growing media like rockwool, coco coir, clay pebbles, or perlite. These materials provide support but do not contain nutrients, which are delivered through the water solution.
My tomato seedlings are turning yellow. What could be wrong?
Yellowing leaves on your seedlings can indicate several issues. It might be a nutrient deficiency, incorrect pH levels in your nutrient solution, or insufficient light. Double-check your nutrient mix, test and adjust your pH to the 5.5-6.5 range, and ensure your grow lights are providing adequate intensity and duration.
